Short answer: Installing a patch panel and switch involves mounting both components in a server rack, terminating incoming Ethernet cables onto the patch panel, mapping port assignments, connecting the two with short patch cords, and organizing everything with proper cable management. The process typically takes 2–4 hours for a standard 24-port setup.
A patch panel and an Ethernet switch sit at the center of every well-organized network. The patch panel handles physical cable termination and labeling; the switch handles traffic forwarding. Get the installation right, and you end up with a system that practically troubleshoots itself. Get it wrong, and you spend months tracing unlabeled cables through tangled bundles.
I've seen both outcomes more times than I can count. The difference almost always comes down to preparation and discipline during the initial install-not expensive equipment or advanced certifications.
This guide walks through the full installation workflow-preparation, rack mounting, cable termination, patching, validation, and cable management-with the kind of detail that actually matters when you're standing in front of an open rack.
Patch Panel vs. Switch: Why You Need Both
People new to structured cabling often wonder why they can't just plug horizontal cables straight into a switch. The short answer is wear and tear. Horizontal runs-the permanent cables in walls and ceilings-are not easy to replace. A patch panel acts as a buffer. The permanent cables terminate at the back of the panel and stay there for years. On the front side, inexpensive patch cords connect each panel port to the switch. When a patch cord wears out, you swap a $2 cable instead of re-pulling a $200 horizontal run.
A patch panel is a passive device-no power supply, no configuration. It provides a labeled row of RJ45 jacks where permanent cables terminate. An Ethernet switch is an active device that reads destination MAC addresses and forwards traffic to the correct port. In PoE networks, the switch also delivers DC power over the cable. Both serve fundamentally different roles, and treating them as interchangeable is the kind of shortcut that creates headaches six months later when someone needs to move a printer to a different floor.
Tools and Materials You Need
Gathering everything before you start prevents unnecessary trips mid-installation. The essentials include a punch-down tool (110-style for most keystone and patch panel modules), a cable tester for verifying continuity and wiring order, a screwdriver or cage-nut tool for rack mounting, a label printer, Velcro cable ties, and the patch cords themselves.
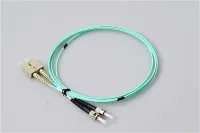
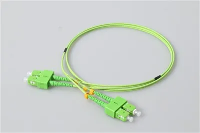
One detail people overlook: match your patch cords to the category rating of the horizontal cables in place. If the building is wired with Cat6A shielded cable, running Cat5e unshielded patch cords bottlenecks the entire channel. The weakest link sets the ceiling for the whole path. This same principle applies in fiber infrastructure-selecting the correct fiber optic patch cord for each application ensures signal integrity end to end.
Step 1: Choose the Right Location
Temperature and airflow influence equipment longevity more than most installers realize. Place the rack in a space with consistent ventilation-ideally a dedicated telecom room with climate control. Avoid utility rooms where furnaces or water heaters introduce heat and moisture. I once walked into a site where the network rack shared a closet with a hot water heater. The switch was running at 55°C and had been rebooting itself randomly for weeks-nobody had connected the dots.
Centrality matters too. The TIA-568.2-D standard (Section 6.2) limits a single horizontal copper run to 90 meters of permanent link plus 10 meters of combined patch cord and equipment cord. Placing your rack near the geographic center of the building keeps every workstation within that 100-meter window and avoids the expense of adding secondary IDFs.
Confirm that sufficient electrical circuits are available. A fully loaded 48-port PoE+ switch draws up to 740 watts per IEEE 802.3at. Add a UPS and a firewall, and you can exceed a single 15-amp, 120V circuit. Plan power before you bolt anything to the wall.
Step 2: Plan the Rack Layout
A standard 19-inch EIA rack measures space in rack units (1U = 1.75 inches / 44.45 mm, per EIA-310-E). Most 24-port patch panels occupy 1U, as does a typical managed switch. Between each patch panel and its paired switch, install a 1U horizontal cable manager-this gives patch cords a clean pathway and prevents cables from dangling over the front of the rack.
The physical position of the patch panel depends on how horizontal cables enter. When cables drop from overhead, mount the panel near the top. When cables rise from a floor conduit, mount it near the bottom. When cables enter from the side, a mid-rack position works best. This isn't an aesthetic choice-it directly affects bend radius control and long-term serviceability.
Use a simple diagram or spreadsheet to map every panel port to its corresponding switch port and endpoint. This port map becomes the single most valuable document for future troubleshooting and MAC (move, add, change) operations. Skip it now, and you'll regret it within the first month.
Step 3: Mount the Patch Panel and Switch
Secure the patch panel to the rack using cage nuts and machine screws. Use a level-eyeballing it is not reliable when you're stacking multiple units. Install the horizontal cable manager directly below the panel, then mount the switch below the cable manager. This "panel–manager–switch" stacking pattern keeps patch cords short and orderly. For racks with multiple pairs, repeat the pattern vertically. Consistency across the rack saves real time whenever someone else needs to work on it.
Step 4: Terminate Horizontal Cables
This step is where precision matters most. Route each horizontal cable to the rear of the patch panel, leaving a service loop of 12 to 18 inches of slack. That service loop isn't wasted cable-it's insurance. If the first termination fails or the panel needs to be repositioned, the extra slack gives you room to re-terminate without pulling new cable.
Strip approximately 2 inches of the outer jacket and untwist only enough of each conductor pair to reach the IDC slot on the patch panel module. This is critical: excessive untwisting degrades the twist ratio that controls crosstalk. TIA-568.2-D specifies a maximum untwist length of 0.5 inches (13 mm) for Cat6 and Cat6A terminations. Follow the color code printed on the module-T568A or T568B. Most commercial networks in the United States use T568B. The important rule is not which standard you pick, but that you pick one and apply it across every single termination.
Seat each conductor firmly using the punch-down tool. The blade cuts excess wire and presses the conductor into the IDC slot simultaneously. If the cut isn't clean, re-seat it. A conductor that isn't fully seated will cause intermittent connectivity issues that are maddening to track down.
In hybrid copper-fiber networks, termination follows a different process on the fiber side-fusion splicing or mechanical connectors instead of punch-down. If your installation includes fiber runs, understanding the differences between fiber pigtails and patch cords helps you choose the right termination method for each segment.
Step 5: Connect Patch Panel to Switch
With all horizontal cables terminated and the switch powered on, connect each patch panel port to its mapped switch port using a patch cord of the correct category and length. Avoid cords with excessive slack-a 1-foot cord where a 1-foot cord fits. Excess cable creates clutter, restricts airflow, and makes individual cable tracing impossible in a dense rack.
Route each patch cord through the horizontal cable manager rather than draping it directly from panel to switch. This discipline seems fussy during installation, but it pays off immediately the first time you need to trace or replace a single connection. If your rack also carries fiber links, the same routing discipline is even more critical-fiber optic patch cords transmit light signals that are sensitive to bend radius violations, so a kinked jumper doesn't just degrade performance, it can kill the link entirely.
Step 6: Label Everything
Label both ends of every cable with the same identifier. A simple scheme works best: the room number or device name followed by the panel port number-for example, "RM-214 / PP1-09." Apply the same label at the wall jack on the far end. Print labels rather than handwriting them. Handwritten labels fade and become illegible within a year or two, especially in warm closets. A basic thermal label printer costs about $30 and pays for itself on the first installation.
Step 7: Test and Validate
Never assume a termination is good just because the cable tester shows a link light. A link light only tells you some electrical connection exists-it doesn't verify correct pin assignment. Run a wiremap test on every terminated port to confirm correct pin assignment across all eight conductors, proper pairing, and the absence of shorts, opens, or split pairs. If you are certifying the installation to TIA standards, a channel test with a Fluke DSX or equivalent cable analyzer provides a pass/fail result against the relevant category specification-measuring insertion loss, return loss, NEXT, and other parameters a basic wiremap tester can't detect.
Separate data cables from power cables by at least 12 inches where they run in parallel, per TIA-569-E guidelines. Crossing at 90 degrees is acceptable. This separation minimizes electromagnetic interference, especially at 10GBASE-T speeds over Cat6A.
Cable Management Best Practices
Good cable management is not cosmetic-it is operational. A well-dressed rack cuts mean time to repair (MTTR) dramatically because technicians can identify and access any cable within seconds. A messy rack turns a five-minute cable swap into a thirty-minute archaeology dig.
Horizontal cable managers create orderly left-to-right pathways for patch cords. Finger-duct style managers with removable covers make it easy to add or remove cables later. D-ring managers are lighter and improve airflow but offer less physical protection.
Vertical cable managers run along rack sides and handle cables traveling between rack units. Plastic managers with bend-radius fingers are especially valuable for fiber jumpers. Velcro cable ties outperform nylon zip ties-they are reusable, adjustable, and cannot be over-tightened to crush cable jackets. Over-tightened zip ties deform the cable geometry, which increases crosstalk and return loss. I've traced more than one intermittent Cat6A failure back to a single over-torqued zip tie buried inside a bundle.
Fiber Patch Panels in Mixed Networks
Many modern networks are not purely copper. Fiber backbone links between floors or buildings are standard practice. When a rack includes both copper and fiber patch panels, keep fiber panels in a separate section with dedicated cable management. Fiber cables have stricter minimum bend radius requirements than copper, and mixing them in the same cable manager is a recipe for damaged connectors and degraded links.
For high-density fiber patching, LC connectors have become the default in most data center environments. A comparison of LC and SC fiber optic connectors can help you select the right option based on density requirements and existing infrastructure.
In FTTH and PON deployments where a single optical input distributes across multiple subscriber lines, PLC fiber optic splitters handle the signal distribution at the patch panel level, making the rack a true convergence point for both copper and optical infrastructure.
Common Mistakes to Avoid
Skipping the port map is the most frequent shortcut-and the most expensive one long-term. Without documentation, every future MAC operation becomes a guessing game that wastes technician hours.
Mixing T568A and T568B standards within the same installation creates split pairs that pass continuity tests but fail under real traffic-one of the most frustrating faults to diagnose. Using patch cords that are too long buries the cable manager in excess cable. And running an unshielded patch cord in a shielded channel breaks the Faraday cage and can actually increase interference compared to a fully unshielded system.
One mistake that surprises people: not budgeting enough rack space. A 24-port panel and a 24-port switch together only occupy 2U, but add horizontal cable managers, a UPS shelf, a firewall, and some breathing room, and you're looking at 12U or more. Plan for growth-adding a second rack later is far more disruptive than buying a taller one upfront.
Frequently Asked Questions
Q: Do I Need A Patch Panel If I Only Have A Few Network Drops?
A: Technically, no-you can terminate cables directly to RJ45 plugs and connect them to the switch. However, even with 5–10 drops, a patch panel adds organization, simplifies troubleshooting, and protects switch ports from wear. A basic 24-port keystone panel costs $15–30. There's no practical reason to skip it.
Q: Should The Patch Panel Go Above Or Below The Switch In The Rack?
A: Standard practice is to mount the patch panel above the switch with a horizontal cable manager in between. This positions permanent cable terminations closest to overhead cable pathways. If your cables enter from below the rack, flip the arrangement-switch on top, panel on bottom-for cleaner cable routing.
Q: What Is The Difference Between A Punch-Down Patch Panel And A Feed-Through Patch Panel?
A: A punch-down panel requires terminating individual conductors onto IDC contacts using a punch-down tool. A feed-through (coupler) panel has RJ45 jacks on both front and back, so you plug in pre-terminated cables from each side. Feed-through panels are faster to install and easier to reconfigure, but punch-down panels provide a more permanent and typically lower-cost termination for long-term horizontal runs.
Q: Can I Use Fiber And Copper Patch Panels In The Same Rack?
A: Yes, and it is very common in modern networks. Keep copper and fiber panels in separate rack sections with dedicated cable management for each type. Fiber cables require gentler handling due to minimum bend radius requirements. Understanding the characteristics of different fiber optic connector types ensures proper termination and compatibility across your mixed infrastructure.
Q: How Often Should I Re-Test Cable Connections After The Initial Installation?
A: Re-test whenever a connection is moved or re-terminated, and perform a full audit annually. For mission-critical environments, semi-annual testing is a reasonable cadence. Any time you experience intermittent connectivity issues, testing the full channel-wall jack through horizontal cable, panel termination, and patch cord to switch-is the fastest way to isolate the fault.
References and Standards
- The technical specifications referenced throughout this guide are drawn from the following industry standards:
- TIA-568.2-D – Balanced Twisted-Pair Telecommunications Cabling and Components Standard (defines the 90m permanent link / 100m channel limit, untwist lengths, and category specifications)
- TIA-569-E – Telecommunications Pathways and Spaces (covers cable separation distances, pathway design, and telecom room requirements)
- IEEE 802.3at (PoE+) – Defines power delivery up to 25.5W per port, with system-level power budgets referenced in this guide
- EIA-310-E – Defines the standard 19-inch rack unit (1U = 44.45 mm / 1.75 inches)