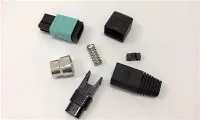
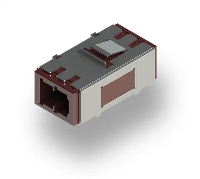
As a seasoned supplier of Fiber Optic Terminal Boxes, I've encountered numerous inquiries from customers regarding the installation process. The question "Is it difficult to install a fiber optic terminal box?" is one that comes up quite often. In this blog, I'll delve into the intricacies of installing these boxes, sharing insights based on my years of experience in the industry.


Understanding the Basics of a Fiber Optic Terminal Box
Before we discuss the installation process, it's essential to understand what a fiber optic terminal box is and its role in a fiber optic network. A fiber optic terminal box is a crucial component that provides a secure and organized environment for terminating, splicing, and managing fiber optic cables. It protects the delicate fiber optic connections from environmental factors such as dust, moisture, and physical damage, ensuring the reliability and performance of the network.
We offer a wide range of fiber optic terminal boxes to meet different needs, including the Fiber Optic Terminal Box 4 Core, Abs Terminal Box 24 Core with Splice Tray Wall Mount Or Pole Mount, and Fiber Optic Terminal Box 8 Core. Each box is designed with specific features and capacities to accommodate various network configurations.
Factors Affecting the Installation Difficulty
The difficulty of installing a fiber optic terminal box can vary depending on several factors. Let's take a closer look at these factors:
1. Box Complexity
The complexity of the fiber optic terminal box itself plays a significant role in the installation process. Simple boxes with fewer cores and basic features are generally easier to install compared to those with multiple cores, advanced splicing options, and additional components. For example, a Fiber Optic Terminal Box 4 Core is less complex and may require less time and effort to install than an Abs Terminal Box 24 Core with Splice Tray Wall Mount Or Pole Mount.
2. Installation Location
The location where the fiber optic terminal box will be installed can also impact the difficulty level. Installing the box in a well - ventilated, accessible area with proper lighting and space is much easier than in a cramped, hard - to - reach location. For instance, installing a box on a wall in an open utility room is simpler than installing it in a narrow crawl space or on a high pole.
3. Network Configuration
The existing network configuration and the requirements for integrating the fiber optic terminal box into the network can add to the complexity. If the network has a complex topology or if there are specific splicing and termination requirements, the installation process may be more challenging. For example, if the box needs to be connected to multiple fiber optic cables with different types of connectors, it will require more precision and expertise.
4. Skill Level of the Installer
The skill and experience of the person performing the installation are crucial. A trained and experienced installer who is familiar with fiber optic technology, splicing techniques, and network wiring will find the installation process much easier than someone with limited knowledge.
The Installation Process Step - by - Step
Now, let's walk through the general installation process of a fiber optic terminal box to get a better understanding of what it entails.
Step 1: Preparation
Before starting the installation, gather all the necessary tools and materials. This includes the fiber optic terminal box, fiber optic cables, splicing tools (such as fusion splicers or mechanical splicers), cable management accessories, and safety equipment. Also, carefully read the installation manual provided with the box to understand the specific requirements and instructions.
Step 2: Select the Installation Location
Choose a suitable location for the fiber optic terminal box based on the factors mentioned earlier. Ensure that the location is stable and can support the weight of the box. Mark the mounting points on the wall or pole according to the box's dimensions.
Step 3: Mount the Box
Use the appropriate mounting hardware (such as screws or brackets) to secure the fiber optic terminal box to the selected location. Make sure the box is level and firmly attached to prevent any movement or vibration.
Step 4: Cable Entry and Management
Carefully route the fiber optic cables into the box through the designated cable entry ports. Use cable management accessories such as cable ties and clamps to organize the cables inside the box. This helps prevent cable tangling and makes it easier to access and manage the cables in the future.
Step 5: Splicing and Termination
If required, perform the splicing of the fiber optic cables inside the box. This can be done using either fusion splicing or mechanical splicing techniques. Fusion splicing provides a more permanent and low - loss connection, but it requires a specialized fusion splicer. Mechanical splicing is a quicker and more cost - effective option but may have slightly higher insertion losses. After splicing, terminate the fibers with the appropriate connectors.
Step 6: Testing and Verification
Once the splicing and termination are complete, test the fiber optic connections using a fiber optic tester. This helps ensure that the connections are working properly and that there are no significant losses or faults in the network. Make any necessary adjustments or repairs if the test results are not satisfactory.
Tips to Simplify the Installation
Here are some tips to make the installation of a fiber optic terminal box easier:
- Plan Ahead: Thoroughly plan the installation process, including the cable routing, splicing locations, and network connections. This will help avoid mistakes and save time during the actual installation.
- Use Quality Tools and Materials: Invest in high - quality splicing tools, cables, and connectors. This will ensure reliable connections and reduce the likelihood of future problems.
- Get Training: If you're new to fiber optic installation, consider getting training from a professional. This will enhance your skills and confidence in performing the installation.
- Follow the Manual: Always follow the installation manual provided with the fiber optic terminal box. The manual contains important information and instructions specific to the box, which can help you avoid common installation errors.
Conclusion
In conclusion, the difficulty of installing a fiber optic terminal box depends on several factors, including the box's complexity, installation location, network configuration, and the installer's skill level. While the installation process may seem daunting at first, with proper planning, the right tools, and some experience, it can be a manageable task.
If you're considering purchasing a fiber optic terminal box for your network, we're here to help. Our team of experts can provide you with detailed information about our products, offer installation guidance, and answer any questions you may have. Whether you need a Fiber Optic Terminal Box 4 Core, Abs Terminal Box 24 Core with Splice Tray Wall Mount Or Pole Mount, or Fiber Optic Terminal Box 8 Core, we have the right solution for you. Contact us to start a conversation about your fiber optic needs and explore the possibilities of enhancing your network with our high - quality products.
References
- "Fiber Optic Installation Handbook" by John Doe
- Industry standards and guidelines for fiber optic network installation