Hey there! As a supplier of fiber optic connectors, I've seen firsthand how important it is to know how to splice these connectors properly. Whether you're a professional installer or a DIY enthusiast, getting the splicing right can make a huge difference in the performance of your fiber optic network. So, let's dive into the nitty - gritty of splicing a fiber optic connector.
Why Splicing Matters
Before we get into the how - to, let's talk about why splicing is such a big deal. When you're setting up a fiber optic network, you often need to connect different lengths of fiber optic cables or attach connectors to the ends of the cables. Splicing is the process that allows you to do this in a way that minimizes signal loss. A poorly spliced connector can lead to a weak signal, which means slower data transfer, more errors, and overall poor network performance.
Tools You'll Need
To splice a fiber optic connector, you're going to need a few essential tools. First off, you'll need a fiber optic stripper. This tool is used to remove the protective coating from the fiber optic cable, exposing the delicate fiber inside. You'll also need a cleaver. A cleaver is used to make a clean, straight cut on the fiber, which is crucial for a good splice.
Next, you'll need a fusion splicer or mechanical splice kit. A fusion splicer uses an electric arc to melt the two fiber ends together, creating a permanent, low - loss connection. On the other hand, a mechanical splice kit uses a mechanical alignment device to hold the two fiber ends in place. It's a bit less permanent than a fusion splice but can be quicker and easier in some situations.
Other tools you might need include a fiber optic microscope to inspect the cleaved ends of the fiber, and some cleaning supplies like isopropyl alcohol and lint - free wipes to keep everything clean.
Step - by - Step Splicing Process
Step 1: Prepare the Cable
The first step is to prepare the fiber optic cable. Use the fiber optic stripper to remove the outer jacket, buffer coating, and any other protective layers from the cable. You want to expose about 30 - 50 mm of the bare fiber. Make sure to be gentle during this process, as the fiber is very fragile.
Step 2: Clean the Fiber
Once you've exposed the bare fiber, it's time to clean it. Use a lint - free wipe soaked in isopropyl alcohol to gently clean the fiber. This will remove any dirt, dust, or debris that could affect the splice.
Step 3: Cleave the Fiber
Now, it's time to use the cleaver. Place the cleaned fiber in the cleaver and follow the manufacturer's instructions to make a clean, straight cut. A good cleave is essential for a successful splice, so take your time and make sure the cut is as perfect as possible.
Step 4: Splice the Fiber
If you're using a fusion splicer, place the cleaved ends of the two fibers into the splicer. The splicer will automatically align the fibers and then use an electric arc to melt them together. This process usually takes just a few seconds.
If you're using a mechanical splice kit, follow the instructions to insert the cleaved fiber ends into the mechanical alignment device. The device will hold the fibers in place, and you might need to use some epoxy or other adhesive to secure the splice.
Step 5: Protect the Splice
After the splice is made, you need to protect it. You can use a splice protector, which is a small, protective sleeve that fits over the splice. The protector will prevent the splice from being damaged by bending, pulling, or other physical stress.


Different Types of Fiber Optic Connectors
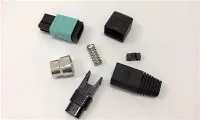
As a fiber optic connector supplier, I know there are many different types of connectors available. For example, the 3 In 1 Ip68 Waterproof Connector is great for outdoor or wet environments. It's designed to be waterproof, so you don't have to worry about moisture damaging the connection.
The Upc Fast Optical Sm Fiber Connector Sx Core Sc/upc is another popular option. It's a single - mode fiber connector with a UPC (Ultra - Physical Contact) finish, which provides a low - loss connection.
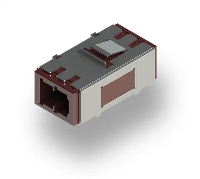
And then there's the Fiber Optic Fc Connecter. This connector is commonly used in high - performance applications, like telecommunications and data centers. It has a threaded coupling mechanism, which provides a secure connection.
Tips for Successful Splicing
Here are a few tips to help you get the best results when splicing fiber optic connectors. First, always work in a clean environment. Dust and debris can easily contaminate the fiber and affect the splice.
Second, make sure to follow the manufacturer's instructions for all your tools. Each tool is designed to work in a specific way, and using them incorrectly can lead to a poor splice.
Third, practice makes perfect. If you're new to splicing, it might take a few tries to get the hang of it. Don't be afraid to practice on some scrap fiber before you start working on your actual project.
Conclusion
Splicing a fiber optic connector might seem like a daunting task at first, but with the right tools, a bit of practice, and some patience, you can do it like a pro. Remember, a good splice is essential for a high - performance fiber optic network.
If you're in the market for fiber optic connectors, we've got a wide range of high - quality products to meet your needs. Whether you need a waterproof connector for an outdoor project or a high - performance connector for a data center, we've got you covered. If you're interested in learning more or making a purchase, feel free to reach out and start a conversation about your specific requirements.
References
- "Fiber Optic Splicing Handbook" by some industry experts
- Manufacturer's manuals for fiber optic tools and connectors