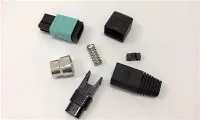
Installing a fiber optic SC patch cord in a conduit is a task that requires careful planning, the right tools, and a clear understanding of the process. As a trusted supplier of fiber optic SC patch cords, I've seen firsthand the importance of proper installation for ensuring optimal performance. In this blog post, I'll guide you through the step-by-step process of installing a fiber optic SC patch cord in a conduit, sharing valuable tips and insights along the way.
Step 1: Plan Your Installation
Before you start installing the fiber optic SC patch cord, it's essential to plan your installation carefully. Here are some key considerations:
- Route Selection: Choose the best route for your conduit, taking into account factors such as distance, obstacles, and accessibility. Avoid sharp bends and excessive lengths to minimize signal loss.
- Conduit Size: Select a conduit size that is appropriate for the number and size of the fiber optic cables you plan to install. A general rule of thumb is to choose a conduit that is at least three times the diameter of the largest cable.
- Cable Protection: Ensure that the conduit provides adequate protection for the fiber optic cables from physical damage, moisture, and environmental factors. Consider using a conduit with a smooth interior to prevent abrasion.
Step 2: Gather the Necessary Tools and Materials
To install a fiber optic SC patch cord in a conduit, you'll need the following tools and materials:


- Fiber Optic SC Patch Cord: Choose a high-quality fiber optic SC patch cord that meets your specific requirements. Consider factors such as cable length, fiber type, and connector quality.
- Conduit: Select a conduit that is suitable for your installation. PVC, metal, and flexible conduits are commonly used for fiber optic installations.
- Pulling String: Use a pulling string to pull the fiber optic cable through the conduit. A nylon or polyester string is recommended for its strength and flexibility.
- Cable Lubricant: Apply cable lubricant to the inside of the conduit to reduce friction and make it easier to pull the cable through.
- Cable Ties: Use cable ties to secure the fiber optic cable to the pulling string and prevent it from getting tangled.
- Connectors and Adapters: If necessary, use connectors and adapters to terminate the fiber optic cable and connect it to other devices.
- Testing Equipment: Use testing equipment such as an optical time-domain reflectometer (OTDR) or a light source and power meter to test the performance of the fiber optic cable after installation.
Step 3: Prepare the Conduit
Before you install the fiber optic SC patch cord, you'll need to prepare the conduit. Here's how:
- Clean the Conduit: Use a clean, dry cloth to remove any dirt, debris, or moisture from the inside of the conduit.
- Install Conduit Fittings: Install conduit fittings such as elbows, tees, and couplings at the appropriate locations to create a smooth, continuous path for the fiber optic cable.
- Seal the Conduit: Use a sealant or caulk to seal the ends of the conduit to prevent moisture and debris from entering.
Step 4: Pull the Fiber Optic Cable Through the Conduit
Once the conduit is prepared, you can start pulling the fiber optic cable through it. Here's how:
- Attach the Pulling String: Attach the pulling string to one end of the fiber optic cable using a cable tie or a pulling eye.
- Lubricate the Conduit: Apply cable lubricant to the inside of the conduit to reduce friction and make it easier to pull the cable through.
- Pull the Cable: Slowly and steadily pull the pulling string through the conduit, guiding the fiber optic cable along with it. Use a pulling tension of no more than 200 pounds to prevent damage to the cable.
- Secure the Cable: Once the fiber optic cable is pulled through the conduit, use cable ties to secure it to the conduit at regular intervals to prevent it from moving or vibrating.
Step 5: Terminate the Fiber Optic Cable
After the fiber optic cable is installed in the conduit, you'll need to terminate it with SC connectors. Here's how:
- Strip the Cable: Use a fiber optic stripping tool to strip the outer jacket and buffer coating from the end of the fiber optic cable, exposing the bare fiber.
- Clean the Fiber: Use a fiber optic cleaning kit to clean the bare fiber to remove any dirt, debris, or oil.
- Install the Connector: Insert the bare fiber into the SC connector and secure it using a crimping tool or an epoxy adhesive. Follow the manufacturer's instructions carefully to ensure proper installation.
- Polish the Connector: Use a fiber optic polishing kit to polish the end of the connector to ensure a smooth, flat surface for optimal signal transmission.
- Test the Connector: Use testing equipment such as an optical time-domain reflectometer (OTDR) or a light source and power meter to test the performance of the terminated connector.
Step 6: Test the Fiber Optic Cable
Once the fiber optic cable is terminated, you'll need to test it to ensure that it is working properly. Here's how:
- Visual Inspection: Use a fiber optic microscope to visually inspect the end of the connector for any damage or defects.
- Optical Loss Testing: Use a light source and power meter to measure the optical loss of the fiber optic cable. Compare the measured loss to the manufacturer's specifications to ensure that it is within acceptable limits.
- OTDR Testing: Use an optical time-domain reflectometer (OTDR) to test the length, attenuation, and continuity of the fiber optic cable. This will help you identify any breaks, bends, or other issues that may affect the performance of the cable.
Step 7: Protect the Fiber Optic Cable
After the fiber optic cable is installed and tested, you'll need to protect it from physical damage, moisture, and environmental factors. Here's how:
- Use Cable Management Solutions: Use cable management solutions such as cable trays, racks, and cabinets to organize and protect the fiber optic cables.
- Install Cable Guards: Install cable guards or sleeves to protect the fiber optic cables from abrasion, impact, and other physical damage.
- Seal the Conduit Ends: Use a sealant or caulk to seal the ends of the conduit to prevent moisture and debris from entering.
- Label the Cables: Label the fiber optic cables to identify their location, destination, and function. This will make it easier to troubleshoot and maintain the network.
Conclusion
Installing a fiber optic SC patch cord in a conduit is a complex task that requires careful planning, the right tools, and a clear understanding of the process. By following the steps outlined in this blog post, you can ensure that your fiber optic installation is successful and that your network performs at its best.
As a leading supplier of fiber optic SC patch cords, we offer a wide range of high-quality products to meet your specific needs. Whether you're looking for 40g Qsfp+ Active Optical Cable (aoc), Om4 Multi-fiber 100gb Multimode 50/125 Fiber Optic Cable Mtp/mpo To Lc Breakout 12 Fiber, or Ip 68 Waterproof Patch Cord, we have the expertise and experience to help you find the right solution.
If you have any questions or need assistance with your fiber optic installation, please don't hesitate to contact us. We're here to help you every step of the way.
References
- "Fiber Optic Installation Guide," available at https://www.example.com/fiber-optic-installation-guide
- "Fiber Optic Testing and Troubleshooting," available at https://www.example.com/fiber-optic-testing-troubleshooting
- "Fiber Optic Cable Management," available at https://www.example.com/fiber-optic-cable-management