How to Make a Fiber Optic Patch Cable
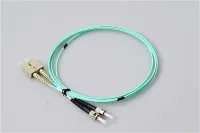
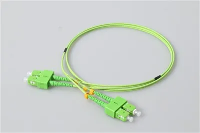
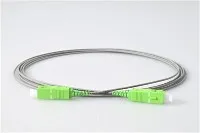
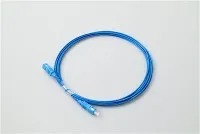
Fiber optic cables are high-speed data transmission cables that use optical fibers to transmit information in the form of light pulses. These cables are widely used in network infrastructure and telecommunications systems due to their ability to transmit data over long distances with minimal signal loss. A fiber optic patch cable, also known as a patch cord, is a short length of fiber optic cable that is used to connect optical devices such as switches, routers, and servers. In this article, we will explore the step-by-step process of making a fiber optic patch cable.
Materials Required
To make a fiber optic patch cable, you will need the following materials:
1. Fiber optic cable (single-mode or multi-mode)
2. Fiber optic connectors (LC, SC, ST, etc.)
3. Fiber optic pigtails (optional)
4. Fiber cleaver
5. Fiber optic stripper
6. Epoxy adhesive
7. Fiber optic polishing film
8. Fiber optic polishing puck
9. Alcohol wipes
10. Heat shrink tubing (optional)
11. Hot air gun or heat shrink oven (optional)
Step 1: Prepare the Fiber Optic Cable
Begin by cutting the fiber optic cable to the desired length. Use a fiber optic cleaver to make a clean and precise cut. It is important to ensure that the cut is perpendicular to the cable''s axis to minimize signal loss. Remember to leave some extra length for stripping and connector termination.
Step 2: Strip the Fiber Optic Cable
Carefully strip away the outer jacket of the fiber optic cable using a fiber optic stripper. Follow the manufacturer''s instructions to determine the proper strip length. Be cautious not to damage the underlying fibers during this process.
Step 3: Clean the Fiber
After stripping the cable, clean the exposed fiber using lint-free alcohol wipes. This step removes any dust, oil, or contaminants that can affect the quality of the connection. Ensure that the fiber is completely dry before proceeding to the next step.
Step 4: Prepare the Fiber Optic Connector
Take the chosen fiber optic connector and remove its dust cap if present. Align the connector''s keyway with the fiber''s orientation and insert the stripped end into the connector''s ferrule. Push the fiber until it reaches the stop point, which is usually marked on the connector body. Make sure the fiber is secure inside the ferrule.
Step 5: Secure the Fiber in the Connector
Mix a small amount of epoxy adhesive according to the manufacturer''s instructions. Apply a thin layer of epoxy around the junction of the fiber and the connector, ensuring that no air bubbles are trapped. Excessive epoxy may cause signal loss or interfere with the connection. Allow the epoxy to cure, following the recommended time frame.
Step 6: Cleaving and Polishing
Once the epoxy has cured, use a fiber cleaver to cleave the fiber at a precise 90-degree angle, ideally 8-16mm from the connector''s tip. Next, attach the connector to a fiber optic polishing puck. Apply a small amount of polishing film to the puck and proceed to polish the connector using a figure-eight or rotational motion. This process smoothens the connector''s end face and improves light transmission. Polish until a high-quality surface finish is achieved.
Step 7: Inspection and Testing
After polishing, inspect the connector using a fiber optic microscope. Check for any scratches, cracks, or imperfections that may impact performance. Additionally, use a fiber optic power meter and light source to verify the strength of the optical signal being transmitted through the cable.
Step 8: Optional Steps
If desired, you can add protective heat shrink tubing to the connector and fiber junction. This tubing provides additional strain relief and protects the connection from physical damage. Use a hot air gun or heat shrink oven to shrink the tubing securely into place. Alternatively, you can choose to terminate the fiber optic cable with a fiber optic pigtail instead of a connector. A pigtail is a short length of fiber with a connector pre-installed on one end, simplifying the termination process.
Conclusion
Making a fiber optic patch cable requires precision, cleanliness, and attention to detail. By following the steps outlined above, you can create a reliable and high-performance fiber optic patch cable that meets the stringent standards of modern communication systems. Remember to exercise caution while working with fiber optics and adhere to safety guidelines to prevent injury or damage to the optical components. With practice and experience, you can become proficient in making fiber optic patch cables, contributing to the efficient and seamless transmission of data in today''s digital age.