How do you attach a fiber patch cord?
A fiber patch cord is an essential component in establishing a reliable and efficient fiber optic connection. It is commonly used to connect devices such as switches, routers, and servers to fiber optic cables. Properly attaching a fiber patch cord is crucial to ensure optimal performance and a secure connection. In this article, we will dive into the step-by-step process of attaching a fiber patch cord, explore the different types of connectors used, and discuss some best practices to follow.
Step 1: Assess the connector type
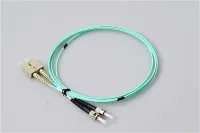
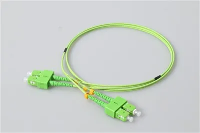
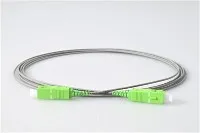
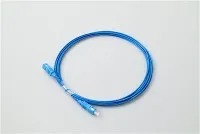
Before attaching a fiber patch cord, it is essential to identify and assess the connector type used in the network infrastructure. Fiber patch cords come in various connector options, including SC, LC, ST, FC, and MPO. Each connector has its own unique features and advantages, making it necessary to choose the appropriate one for the specific application.
Step 2: Inspect and clean the connectors
To achieve a secure and high-quality connection, it is crucial to inspect and clean the fiber connectors before attaching the patch cord. Any dust, dirt, or debris on the connectors can negatively impact signal transmission and lead to unreliable connections.
Begin by visually inspecting the connector end faces using a fiber inspection microscope or a portable fiber optic microscope. Look for any signs of scratches, contamination, or damage. If any issues are detected, proper cleaning or replacement may be necessary.
Cleaning the connectors can be done using specialized fiber optic cleaning tools. These tools typically include lint-free wipes, cleaning solutions, and connector cleaning pens. Gently wipe the connector end face using the cleaning solution and a lint-free wipe. Be sure to follow the manufacturer''s instructions and avoid touching the cleaned surface.
Step 3: Aligning the connectors
Once the connectors are inspected and cleaned, align them properly for connection. This involves inserting the patch cord connector into the corresponding port or adapters on the devices being connected. It is important to ensure the connectors are securely fitted, as loose connections can cause signal loss or interruptions.
Step 4: Securing the connectors
After aligning the connectors, secure them in place to prevent accidental disconnections. Depending on the connector type, various methods can be used to secure the connection. Some connectors feature latches that can be engaged, while others may require tightening screws or snap-in mechanisms.
Ensure that the connectors are properly secured without applying excessive force that could damage the fiber optic components. A snug fit is usually sufficient to prevent disconnections while allowing for easy removal when required.
Step 5: Testing the connection
After attaching the fiber patch cord, it is important to test the connection to ensure its performance and reliability. This can be done using specialized fiber optic testing equipment, such as optical power meters or optical time-domain reflectometers (OTDRs). These tools measure parameters such as signal strength, loss, and reflection.
Performing regular testing will help identify any issues or abnormalities in the fiber optic link. It also allows for troubleshooting and prompt resolution of problems, ensuring optimal performance in the network.
Best practices for attaching fiber patch cords:
To ensure a successful and efficient fiber patch cord attachment, here are some best practices to follow:
1. Handle patch cords with care: Fiber patch cords are delicate and can be easily damaged if mishandled. Avoid bending or twisting the cables excessively and store them properly when not in use.
2. Label patch cords: Labeling the patch cords can simplify identification and troubleshooting in larger network infrastructures. This helps save time and minimizes the risk of confusion during maintenance or upgrades.
3. Avoid excessive pulling or tension: Excessive pulling or tension on fiber patch cords can lead to fiber breakage or damage to the connectors. Be mindful of the cable''s bending radius and avoid stressing the cables beyond their specified limits.
4. Regularly inspect and clean connectors: Periodically inspecting and cleaning the connectors prevents debris buildup and ensures optimal performance. Dust and dirt can accumulate over time, impacting signal transmission and causing connection issues.
5. Replace damaged or worn-out patch cords: If any patch cords show signs of damage, wear, or degradation, it is advisable to replace them promptly. Damaged cables can introduce signal loss or interruptions, compromising the overall network performance.
6. Keep connectors protected: When not in use, it''s important to protect the connector end faces to prevent damage. Using dust caps or protective covers can safeguard the connectors from dirt, dust, and accidental damage.
7. Follow manufacturer guidelines: Each manufacturer may have specific recommendations for attaching their fiber patch cords. It is crucial to read and follow the provided guidelines to ensure compatibility and optimal performance.
In conclusion, attaching a fiber patch cord requires careful consideration and adherence to proper procedures. From assessing connector types to cleaning and aligning the connectors, each step is vital to establishing a reliable and efficient fiber optic connection. By following best practices and regularly maintaining the patch cords, network administrators can ensure optimal performance and longevity in their fiber optic infrastructure.