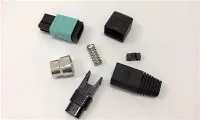
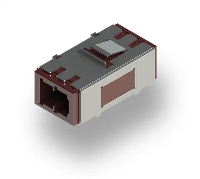
Terminating a Fiber Optic MU Connector involves a series of precise steps to ensure optimal performance and reliable connectivity. As a leading supplier of Fiber Optic MU Connectors, I understand the importance of providing clear guidance on this process. In this blog post, I will walk you through the steps to terminate a Fiber Optic MU Connector, offering insights and tips based on my experience in the industry.


Step 1: Gather the Necessary Tools and Materials
Before you begin the termination process, it's essential to gather all the tools and materials you'll need. This includes:
- Fiber Optic MU Connector: Ensure you have the correct type of MU connector for your application.
- Fiber Optic Cable: Select a high-quality fiber optic cable that is compatible with the MU connector.
- Fiber Strippers: These tools are used to remove the outer jacket and buffer coating from the fiber optic cable.
- Cleaver: A cleaver is used to create a clean, flat end on the fiber optic cable.
- Epoxy or Adhesive: Depending on the type of MU connector, you may need epoxy or adhesive to secure the fiber in the connector.
- Polishing Equipment: Polishing is a critical step in the termination process to ensure a smooth, flat surface on the fiber end face.
- Inspection Microscope: An inspection microscope is used to examine the fiber end face for any defects or contaminants.
Step 2: Prepare the Fiber Optic Cable
The first step in terminating a Fiber Optic MU Connector is to prepare the fiber optic cable. Start by stripping the outer jacket and buffer coating from the cable using a fiber stripper. Be careful not to damage the fiber during this process. Once the outer jacket and buffer coating are removed, clean the fiber using a lint-free wipe and isopropyl alcohol to remove any dirt or debris.
Step 3: Cleave the Fiber
After preparing the fiber optic cable, the next step is to cleave the fiber. A cleaver is used to create a clean, flat end on the fiber. Place the fiber in the cleaver and follow the manufacturer's instructions to make a precise cut. The cleave length should be within the specified range for the MU connector.
Step 4: Insert the Fiber into the Connector
Once the fiber is cleaved, it's time to insert it into the MU connector. Carefully insert the fiber into the connector until it reaches the end. Make sure the fiber is centered in the connector and that there are no kinks or bends. If the connector requires epoxy or adhesive, apply it according to the manufacturer's instructions.
Step 5: Cure the Epoxy or Adhesive
If you used epoxy or adhesive to secure the fiber in the connector, you'll need to cure it. Follow the manufacturer's instructions for the curing process, which may involve using a curing oven or allowing the epoxy to dry at room temperature. Make sure the epoxy or adhesive is fully cured before proceeding to the next step.
Step 6: Polish the Fiber End Face
Polishing is a critical step in the termination process to ensure a smooth, flat surface on the fiber end face. Use a polishing machine and polishing film to polish the fiber end face. Start with a coarse polishing film and gradually work your way up to a fine polishing film. Follow the manufacturer's instructions for the polishing process to achieve the best results.
Step 7: Inspect the Fiber End Face
After polishing the fiber end face, it's important to inspect it using an inspection microscope. Look for any defects or contaminants on the fiber end face, such as scratches, pits, or dirt. If you find any defects, you may need to repeat the polishing process or replace the connector.
Step 8: Test the Connector
Once the fiber end face has been inspected and approved, it's time to test the connector. Use a fiber optic tester to measure the insertion loss and return loss of the connector. The insertion loss should be within the specified range for the MU connector, and the return loss should be as low as possible.
Step 9: Protect the Connector
After testing the connector and ensuring it meets the required specifications, it's important to protect it. Use a dust cap to cover the connector when it's not in use to prevent dirt and debris from entering the connector.
Conclusion
Terminating a Fiber Optic MU Connector requires precision and attention to detail. By following the steps outlined in this blog post, you can ensure a successful termination and reliable connectivity. As a supplier of Fiber Optic MU Connectors, I offer a wide range of high-quality connectors and termination kits to meet your needs. If you have any questions or need further assistance, please don't hesitate to contact me. I'm here to help you with all your fiber optic connector needs.
Links
- Fiber Optic Fast Connector Ftth Pre-embedded Sc
- Ferrule Field Assembly Connector Fast/quick Connector
- Fiber Optic Fast Connector
Contact for Purchase
If you are interested in purchasing our Fiber Optic MU Connectors or other fiber optic products, please feel free to reach out to us. We are ready to engage in detailed discussions to understand your specific requirements and provide you with the best solutions.
References
- "Fiber Optic Installation and Maintenance Handbook" by R. A. Liebezeit
- "Fiber Optic Test and Measurement" by D. L. Hecht